Hi friends! I wanted to share how I made my wall hanging, not because I expect you to copy it–you certainly are welcome to, but more because I think it’s inspiring to be reminded to use what we can find in all sorts of new ways. This project was SO fun to collect for and to make!
I pinned this image from a window installation created by Nikki Gabriel years ago. The layers, the textures, I couldn’t get it out of my head.
One day I showed it to my assistant, Megan and she mentioned it reminded her of a mop head.
Hmmmm….
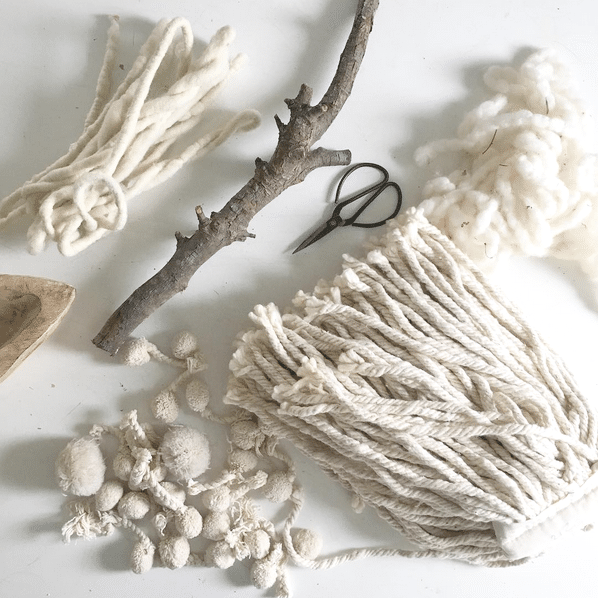
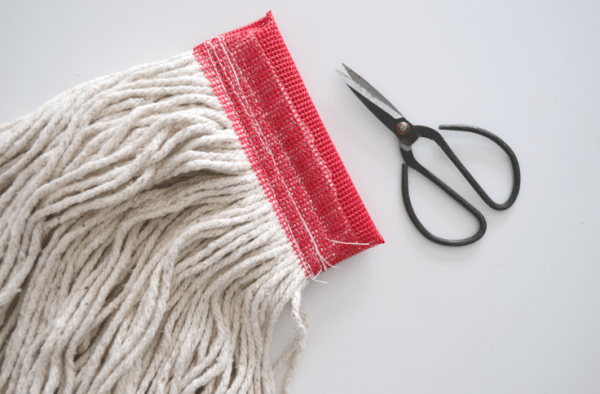
Months later, I was at a thrift store and saw a mop head for $2. And I remembered Megan’s comment so I bought it. When I got home, I gathered other bits and pieces that I thought might work: the mop, some heavy yarns, a long stick, and poms..
A few years ago I purchased these pom pom throws. And I didn’t read how to wash them, I just threw them in the washer and dryer and all the poms fell off. And I kept them. At two for $20, they were still worth it!
Let’s get started!
The first step in making this wall hanging is to go ahead and murder every cat within a one mile radius.
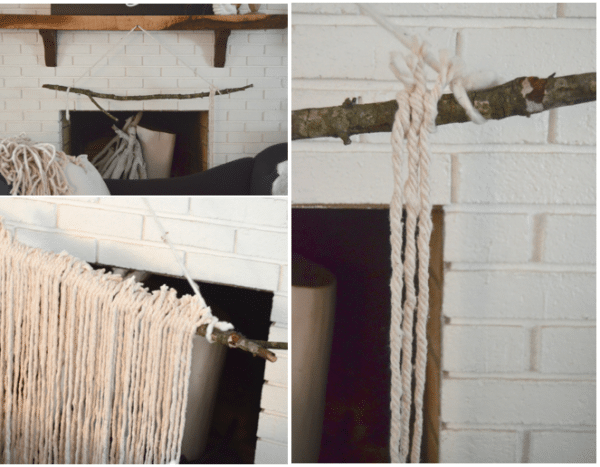
Then I cut a piece of yarn a little longer than my stick and tied the ends onto the ends of my stick so I could hang it while I worked–you’ll want to be able to hang it. And then I took the strips of my mop and tied them on–just like I tie the first part of a shoe. Over and over again down the line. Every knot the same.
I was lucky because once I cut open the mop where it was sewn together at the top, it was full of all of these long strands already cut and ready to tie! Jackpot!
Be sure to flip the stick over and pick which knotted side you like best–I like the back side of the knots.
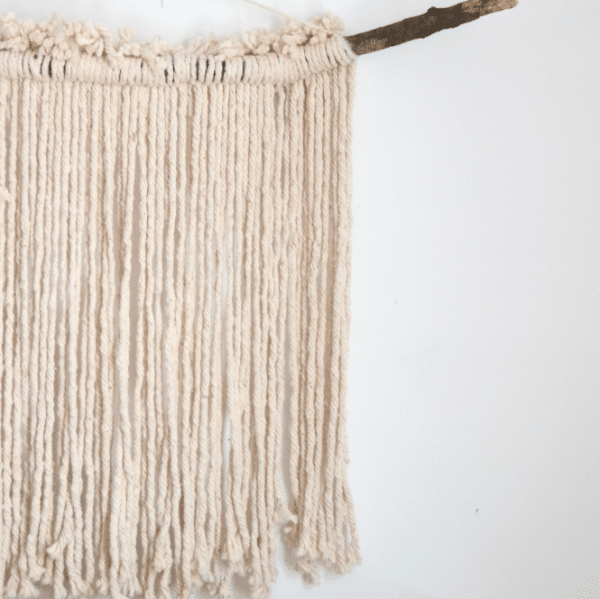
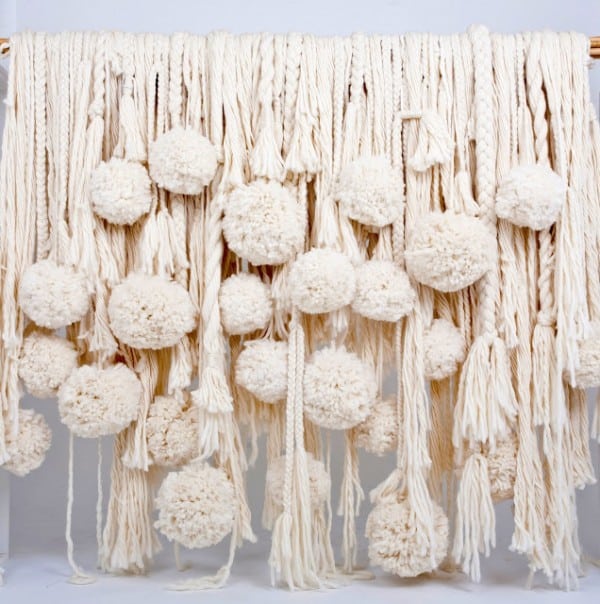
Here’s what I ended up with.
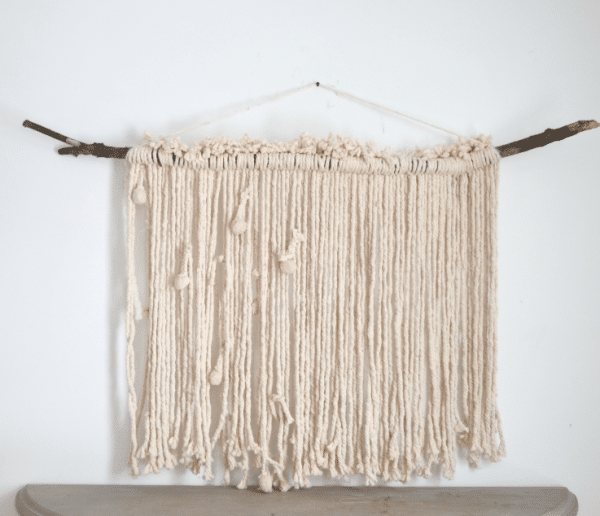
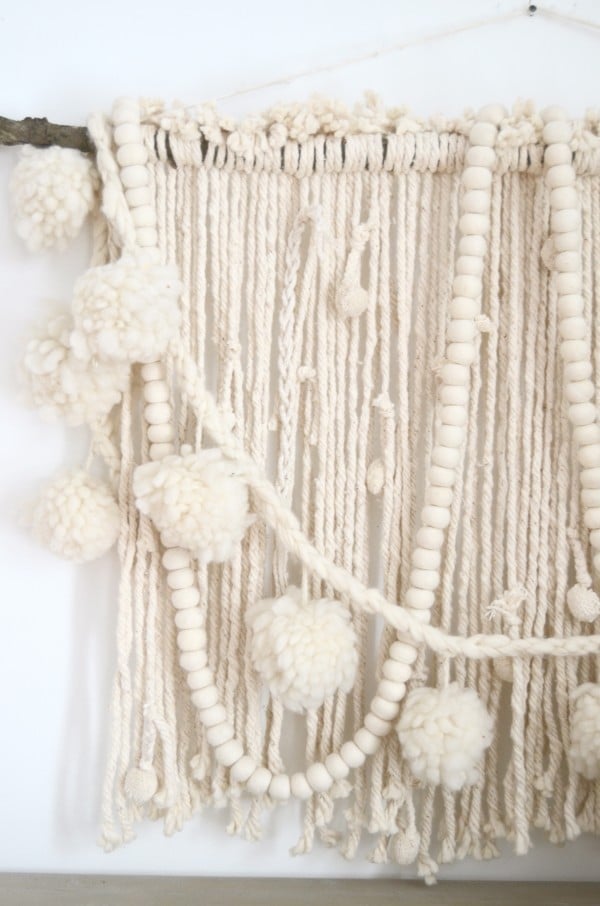
Then I tied some of those poms to it…
Don’t forget that tip I had about the cats.
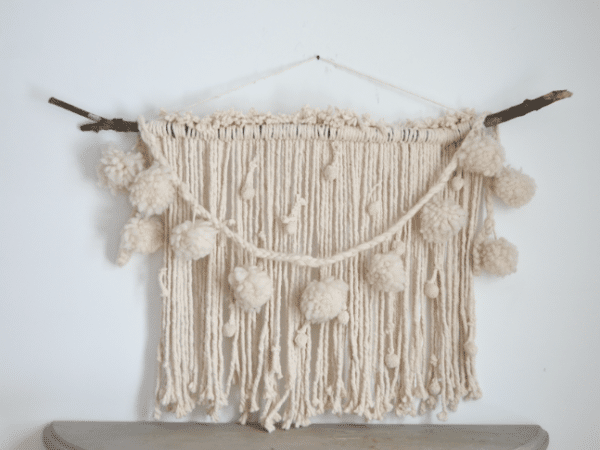
Once I tied on those poms, I remembered that I had just packed away my wool pom garland. I bought mine at Anthropologie a few years ago, but there are a ton of DIYs–Emily’s is my favorite.
So I draped it over the branch.
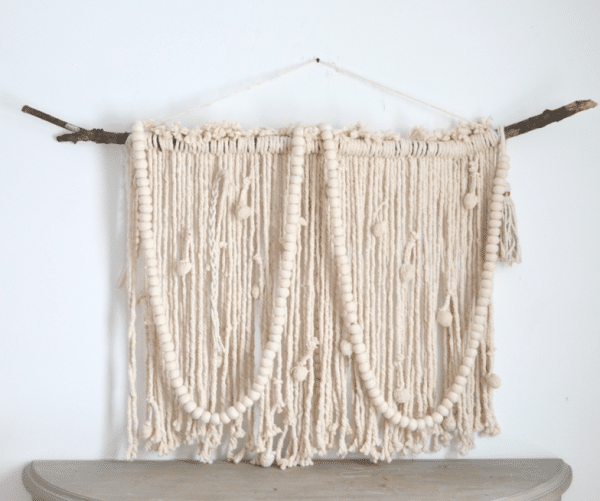
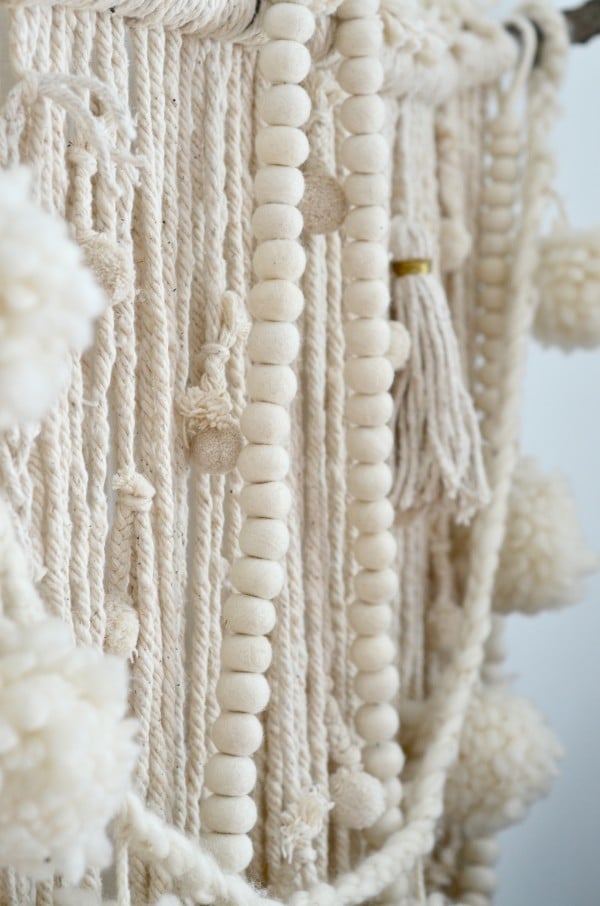
As I was digging around in my Christmas stuff, I found my two felted wool garlands (West Elm, ages ago). So I draped those on…
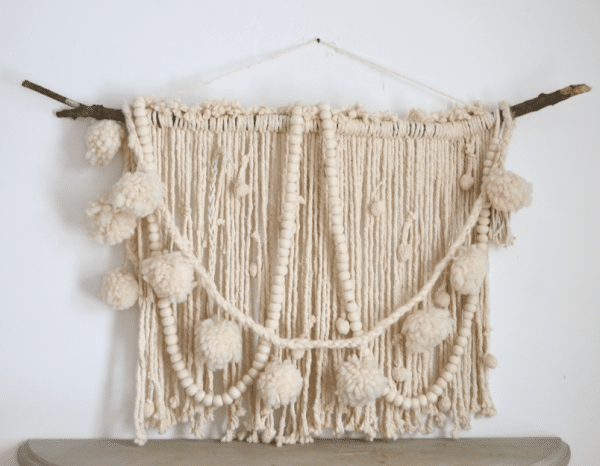
It was fun just to layer on whatever I could find.
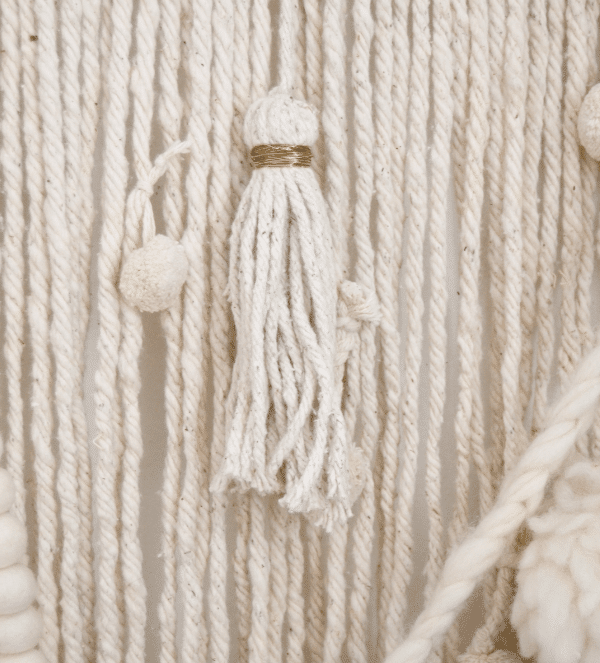
I even made a tassel from another mop head.
And warning…
All mops are not created equal.
I bought an extra mop head but this one was all sewn together at the top, and the mop was all continuous loops which made it really difficult to cut apart. Ideally, you want to find a mop that has long individual strings that are sewn together in the middle (like what I used for the body of the hanging–sadly, I found it at a thrift store, so I can’t tell you the type it is). But, this one worked great for making the tassel and would even work for making some small braids.
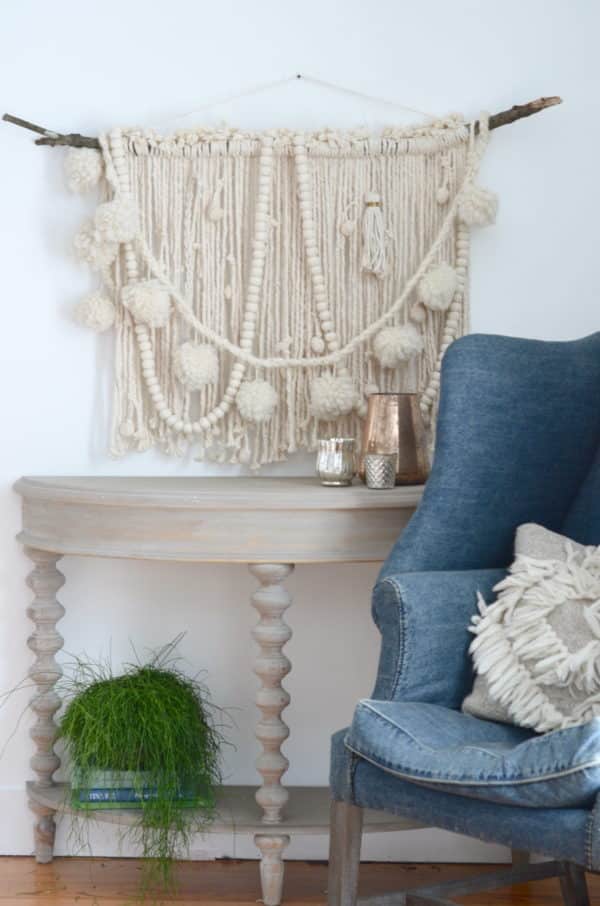
The thing about making this type of wall hanging is that you can use whatever you want and make it as any size and color you want and as simple or layered as you like. Start with long strands of something (rope, yarn, threads, pieces of fabric) and then build on that with things you can find or make…
- garlands
- poms
- tassels
- finger knitting
- scraps
- doilies
- braided and tied pieces
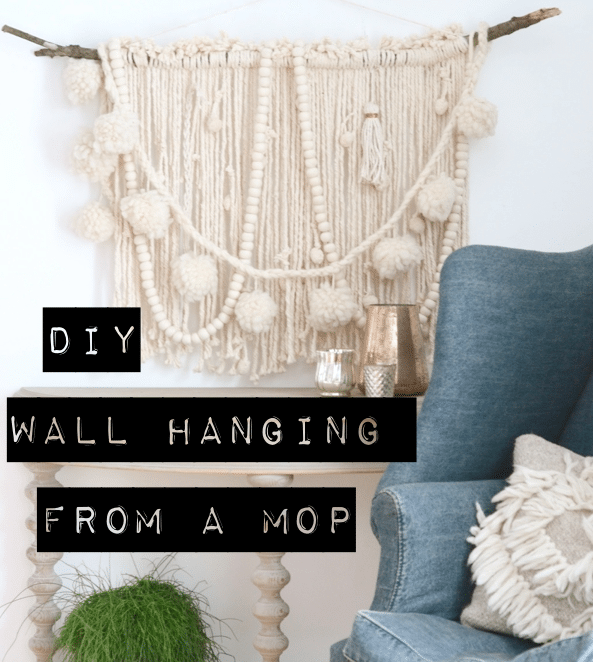
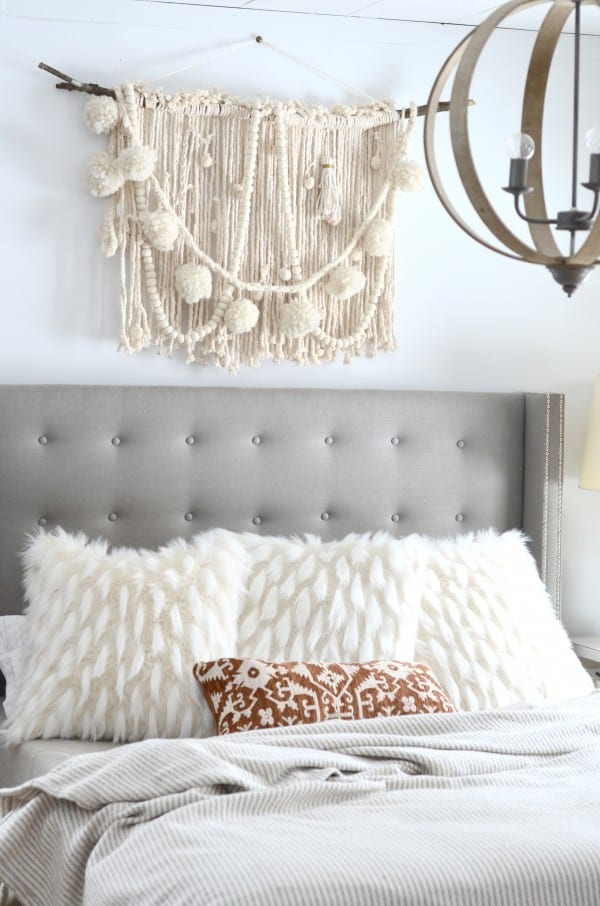
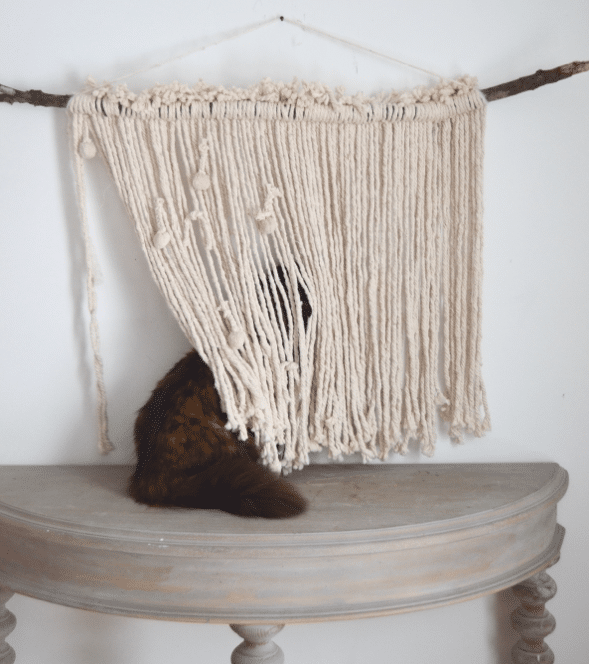
I ended up hanging mine over the bed–and magically, the cats haven’t seemed to care about it any more.