Since the moment I knew my sister was going to write a book, I knew I was going to throw her a big party. Book pages seemed to be the obvious choice for decor.
I wanted the decorations to be fantastic. And I remembered what Henri says..

So I purposely limited myself to books and paper. And anything I could find around the house was fair game to join in the fun with a supporting role.
Here’s the breakdown of the money I spent on decorations–not including fresh flowers
$4 :: roll of craft paper
$6 :: bag of long glue sticks {never buy the short ones, you {I} have to keep loading them too often and it’s annoying, also, don’t buy the blueish sticks–make sure they are VERY clear or else your glue will have a blueish hue.
$3 :: extra books from the thrift store–I liked their cover color and thought I might use those for something, I didn’t
$1.29 :: extra tall hard back book from the thrift store with old fashioned typing–it looked like an old syllabus and I used it for the long pages on the book page wreath
$4 :: straw wreath from Micheal’s craft store
$3 :: hired my boys to harvest branchy, twiggy sticks from the patch of trees down the street
$2.50 :: ordered punched out birds from etsy
Grand Total:: $23.79
My approach to decorating anything is ALWAYS the same, whether it be my bedroom or a party.

And I know we are discussing 20 ways to decorate with book pages but just to remind ourselves how to get in that creative mood…
1.Look for inspiration.
My inspiration for Emily’s party was the displays at Anthropologie and any book page ideas I could get my virtual hands on. So I scoured the internets for both and then I made a party board on pinterest so I could surround myself with good ideas. I probably started in the summer, but there’s no time limit-you can start a year or a week ahead of time, it’s never too late.
2. Decide to use what you have
I like to assume I’m going to use what I have. I don’t come up with a concept and then go buy stuff to make it happen. NO. NEVER. DO NOT DO THIS. EVER. STOP. First, gather what you have and play with it. For me, that meant grabbing a stack of old books I knew we’d never use and start messing with them. I’ll explain more later in this post. But the reality is, limiting yourself to a few things will actually result in a more creative process–just like Henri says.
3. Keep it crazy simple, Crazy. And yes, I just called you Crazy.
I like for it to seem like it took hours/days/weeks on something but in reality most things I do are super, duper, lighting fast. I only do what I get a lot of bang for my time. Even my dear friend Angela who knows me all too well, proclaimed that I must not sleep. I go to bed at 9pm and sleep like a baby. I just know how to make it look like I slave away for things. It’s a fine art, and I admit, it’s something I strive for~having the appearance that I’ve spent hours on something when in actuality it took an iced coffee and two and a half minutes.
So, I knew was I wanted book page decor and that I wanted an Anthropologie-esque feel. I’ve also noticed that Anthro doesn’t depend on expensive materials for their display designs. It’s all simple stuff. It seems like the key to their displays are two fold: 1. Large quantities of easy to attain something {be it moss or paper plates or coffee filters or yarn or buttons or whatever–in my case, that mystery item would be book pages} and 2. repetitive patterns of something placed together en masse. Did I crack the Anthro code?
I had lots of books with lots of pages and I knew it was less about the exact little thing I did with each page on its own, and more about the book pages as a whole and how I placed them together. So this meant I didn’t focus on what one page was going to look like, I focused more on the shape or feeling of the finished idea.
How does one do this?
I started by just cutting shapes. I had no idea how I would use them. But I knew I had to start if I was ever gonna finish.

So I cut leaves.
I had a vintage dictionary and I tore out some pages, stacked them, folded them in half and cut a leaf shape. I didn’t make a pattern or try to get them identical {remember when we all cut paper hearts in grade school for valentine’s day? we didn’t use a pattern we all knew how to fold paper in half and cut a heart~that’s how you cut a leaf shape} because I knew it was the overall finished design of the leaves as a whole that set the tone for the idea, not each individual leaf and how perfectly they were cut. Cut the leaves fast and furious, this isn’t the place you want to invest your time.
I hated that they had a crease but I went ahead and punched a hole in each leaf and strung them about 6 inches apart on a string. Then I hung that little garland on my stair rail. I hated it. It was weak. It was empty. It was hideous. I wanted to cry and throw a fit spend enormous amounts of money at Anthropologie on drawer pulls and candles and skirts. But it was a start. And I had only used about 10 pages~I still had about a thousand to go so I had room to fail. And hate me, but I don’t have a photo of it.

So I left it there looking ugly for a few days. And then I made a book page wreath or two.
Hence the first real way to decorate with books::
1. Make a book page wreath or two.
And I paid attention when I made my wreaths. I noticed that book pages look better when they are manipulated–rolled, folded and smashed, they are more interesting when you do something to them and then keep doing it and make a group. Just like Anthropologie. Even with this wreath, some of the rolled pages are wonky and imperfect, but as a whole, the wreath looks good and has impact, it’s not about the individual page so that’s not worth spending time on.
So, after a few days of looking at my little empty leaf garland I took it off the stairs and neatly gathered it so I could move it to another room. And then the magic happened The tightly gathered leaves looked good together. And that ladies and gentlemen is how the magic happens.
It begins with being ok with not knowing what exactly you are making yet committing to start anyway. And then, when you make something and hate it, you don’t cry or throw it away or complain that someone else always has good ideas that work and you don’t. You wait. And you look at it. And you grab the pieces and pay attention.

When I grabbed the ugly garland of leaves tied onto string it ended up looking like a little vine. So I walked into the breakfast area and hung them on a nail that I always have nailed into the top of my hutch. Everyone has nails nailed into the tops of their hutches, right? I didn’t take a photo because I thought I was just goofing off. But as I played with the crazy knotted garland all wonky and hanging from the nail, I thought I might be onto something.
I cut about 40 more leaves and hot glued them to the mess of stringy garland I hung and it started to take shape. Twenty minutes later I had this.

And this.

You can still see the string and the leaves hanging down are still kind of spaced apart. And see that bouquetish thing in the corner?

I just kept adding to it until it felt right.
Which takes us to number two on our list, this is gonna take a while, isn’t it?
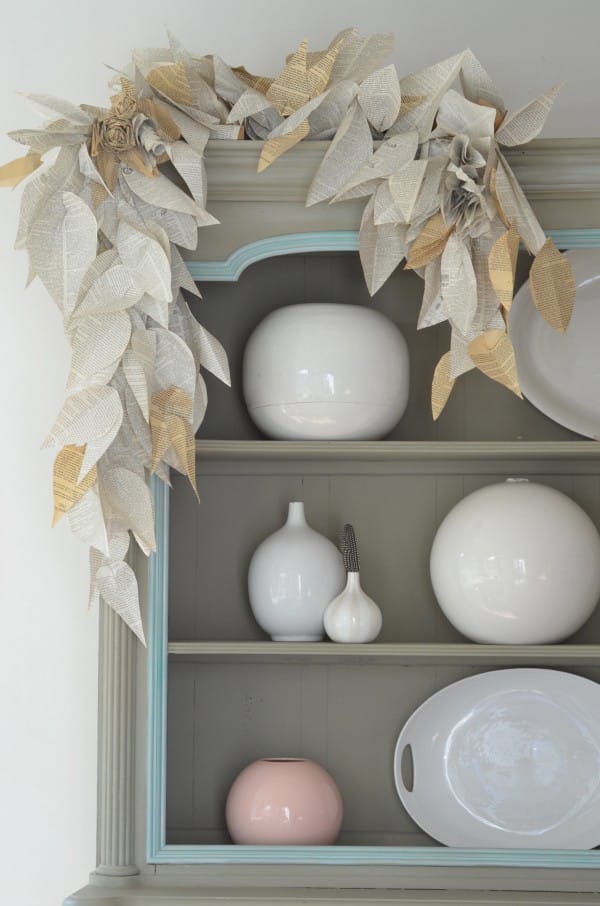
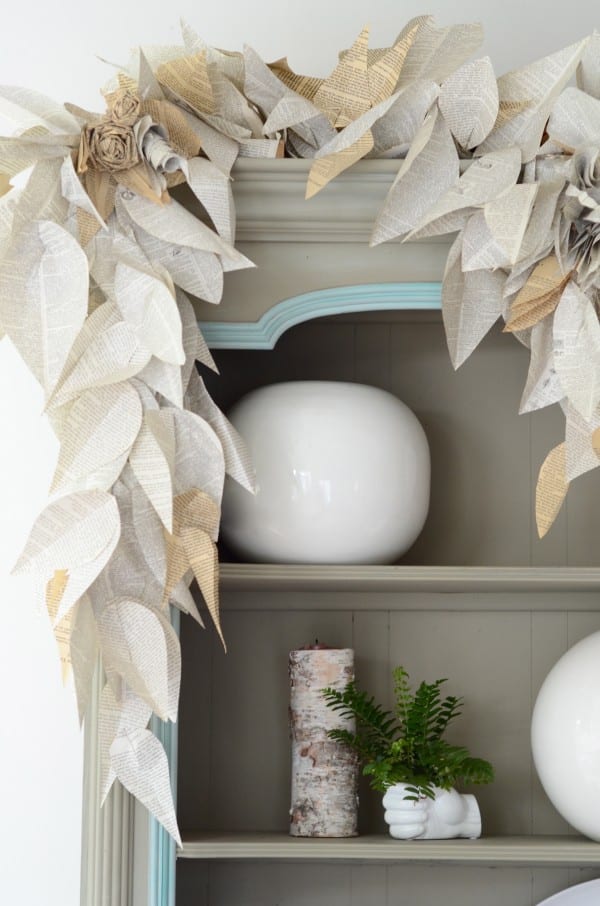
2. Make a book page garland with or without a bouquet
That took negative 3 minutes to make. I just cut more leaf shapes out of a thicker book. Then I rolled some paper and hot glued the mess together keeping in mind that flowers usually have something coming out of the middle and the leaves or petals all around.
I used the book folded inside itself to make leaves. See how the edges of the leaves are the margin of the book? Not required but it adds an extra dimension. It’s not supposed to be a literal flower. But just give the idea of a flower. I also used my old fabric flower making skills that Tiny Twig taught me.
Not sure she ever did a tutorial but they are all over the internets. Here’s the basic instructions, you just roll, fold, glue, repeat. You can see a few rolled roses from book pages tucked in there.

As the garland was growing across the top of the hutch, I knew I needed to stabilize it with something other than that one nail. So I grabbed some craft paper out of a package I had just opened from the mail. I wanted to be able to completely remove the garland and put it someplace else so I didn’t want it attached to the hutch permanently.
I could have hot glued everything up there since glue peels off and no one will ever see the top of my hutch anyway–until I show you in photos like this, but, I had enough sense to know I might want to reuse the garland in my office or something.
I noticed how pretty the book pages looked with the craft paper so I twisted it and made a vine out of it. Then I glued more leaves to it.

Ohh, kind of neat huh? I loved how the craft paper looked just like branches. But, I felt like they took away from the original garland. Why waste an entirely new idea where I already had something pretty? So I took down the craft paper twigs and saved them in my office for a few weeks having no idea what or where or if I would use them.
And you know, until I wrote this post I forgot about all the ways I tried this hutch, it was never a tedious process but pure fun for me.

Once I took off the craft paper vines, the simplicity of the strictly pages garland was able to shine. See how shiny? Every few days I’d hot glue a few more leaves onto places where I thought it had gaps.

A little tip when replicating leafy branches/swags/garlands is to make sure all your leaves run or fall in the same direction. See how they look kind of natural because the end of them all start on the branch? Just like real leaves. And it’s much easier to do this when working at the actual place they’ll be hanging.
So don’t sit on the floor and make your swag and then expect it to hang perfectly once you have it in place. I hot glued each leaf on individually as the entire swag was hanging in its final resting place. It sounds more time-consuming than it is. It takes about 2.2 seconds to hot glue a leaf.
And I used a little method to give some of the leaves more dimension.

Here’s a bunch of leaf shapes with stems. See the ones on the right? I hot glued them right above the stem and stuck them together, then once they dried {2.4 seconds later} I kind of popped them open so they wouldn’t just lay folded. I didn’t unstick the glue, I just kind of flatted them open so the leaves had a curve to them.


It’s kind of hard to explain but basically what I’m saying is don’t be afraid to mess around with leaf shapes and gluing techniques to get a fun lively shape. And if you look closely, you can see why I cut some leaves with a stem shape.

Oh and also when I’m decorating, either for a room or a party or whatever, I like to focus on focal points. Sounds easy enough, right? But it’s easy to get sidetracked. If I don’t keep my focus I can squander all my time and resources on little things and have nothing of impact. Kind of like my addiction to accessories, I’ve been dealing with. If I invest my time and money on accessories but not the big stuff, it’s kind of a waste.
So, as I thought about what I wanted for party decor I considered statement pieces, signature pieces, and focal points.
I wanted the place where Emily would be signing books to be special so I tried to make it a focal point. My son found a big twiggy branch and I stuffed it into a potted plant and hot glued book page leaves to the branches where real leaves had once been.
3. Tree with book page leaves


I used the same method for the tree branches next to the front door. Just cut leaves with a stem and hot glue the stem to the place on the branch where a leaf would naturally grow….I’ll show you a close up after the next picture, this post is starting to get disorganized.
Oh look…
4. Cut out book page letters


And here are a few other things I did that don’t really need explanation, just helped with the overall feel..

5. Cut book pages into a recognizable shape {my sister’s book has a bird on the cover, perfect!}
I ordered 300 book page confetti birds from etsy. They were $2.50 Less money and work than buying my own bird punch.

A dot of hot glue on the bird stuck them mysteriously onto the inside of the lamp and it looked like there was a mini flock of birds flying around in there.

Name tags = target stickers + those birds hot glued

6. Make book page flags
Have some kabob skewers? Then you can make these charming flags too. They take 1.8 seconds each. So you can make half a million in about 20 minutes.

Melissa got a photo of some of the food–see how we stuck flags everywhere to add height to the cupcakes?

7. Use the paper shredder to shred book pages

8. Roll them into cones ok so I did that for the wreath too, but here they are made to look like part of a paper plant.

9. Strip a book
These stripped or nekkid books as I like to call them go from ugly, not even worth taking to the thrift store to a stack of pure texture and art. I used them on the serving table to raise platters, set plants on them, and just scattered them about. Just rip the covers, spines and backs off, I promise the books won’t scream at you.

10. Flared books
Rip the covers out, break the spine and stretch it out in a circle. Sounds criminal, doesn’t it? I think I glued the front and back pages together to hold it open.

Melissa brought a lot of flared books for the pot rack, here’s how she made them and even more bookish items.

So here you can see different bookish methods. Shredded paper, rolled paper, flared book over there on the left , random flags.

By the way here’s how the table started. I have 3 runners that I bought over the past few years from the Goodwill. I use them in the fall and winter. I wanted them layered and random. And then I grabbed some doilies and stuff.

I think it looks better with stuff falling off the edge of the table.

The table was neutral except for the food. So I gathered all the glass and white and candles from around the house.

Hate me, but I hate these dishes that have the holes for ribbon. Like we can’t get any more creative than putting a different color ribbon on our white dish? Never mind. So here’s a piece of shredded book woven through the holes.

Apothecary jars stuffed with scraps left over from the cut leaves.
Oh, SCRAPS, that should be number 11.
I saved every scrap and then I was amazed at how artsy the scraps looked stuffed in extra apothecary jars and cloches.

12. Cover a box with pages
Reeve covered a box with random book pages, it’s one of my favorite things.

And I grabbed that box I covered with book pages from weeks ago….

…and I hung it on the wall under another book page wreath and above a big vase full of rolled book pages. Nobody even asked it it was just a plain, empty, flat cardboard box. Which it was. And is. And is to come.

13. Book page table-cloth
Reeve and Christiana made the book page table-cloth. We covered the table with craft paper then they just hot glued lots of different sizes and hues of pages. They were smart and suggested cutting then end of the craft paper at the end of the table and turning the pages up as opposed to how you see it here in the photo.

Don’t worry about ending them perfectly in a line–it’s better to have all the pages end randomly. And see how the pages fall all ruffly? Only glue the tops, not the entire page, that way they lay really pretty kind of like a waterfall.

14. Incorporate book pages into your existing signature pieces.

For me that meant spearing a stack of pages with Marlin’s point and hanging a banner on Elky’s horns.
Oh A book page banner, that’s number 15.
Banners, pennants, flags, buntings, whatever you like to call them, they are easy, fast and festive.

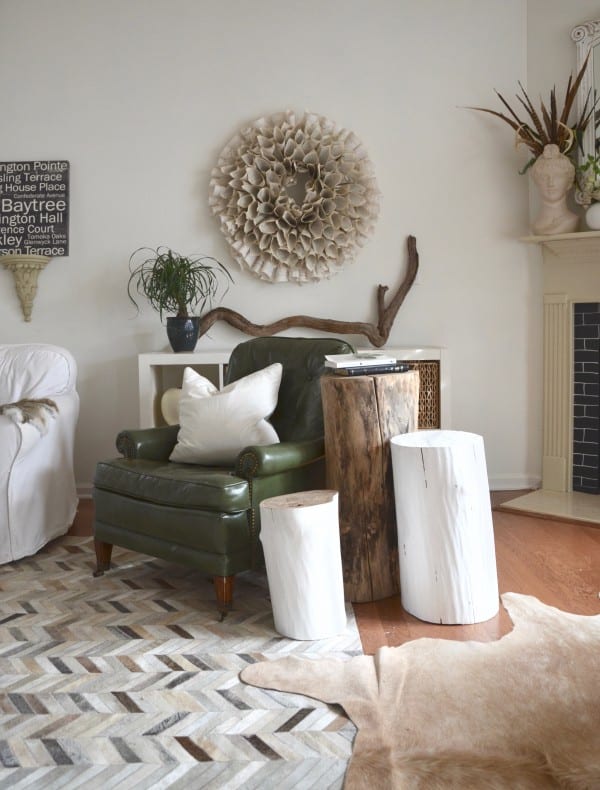
16. Create book page vine growing from a bust.
Don’t have a bust? Or at least not one you want vines growing out of? No problem, make it grow out of a planter or urn or anything.

I grabbed that vine that I first had on the hutch but ugh, the leaves weren’t hanging right. I plucked them off and reglued them on once I had all the vines situated.


I had some pre-existing holes in my walls so I just hid a few nails in the vine to hold it up, but you could easily use command hooks.

The vine filled in a really awkward space that I’ve always had trouble filling. I think I might leave it for a while. And there on the left on the dresser I have another book page covered box and two yard sale frames holding ripped out book pages.
so 17. Frame book pages

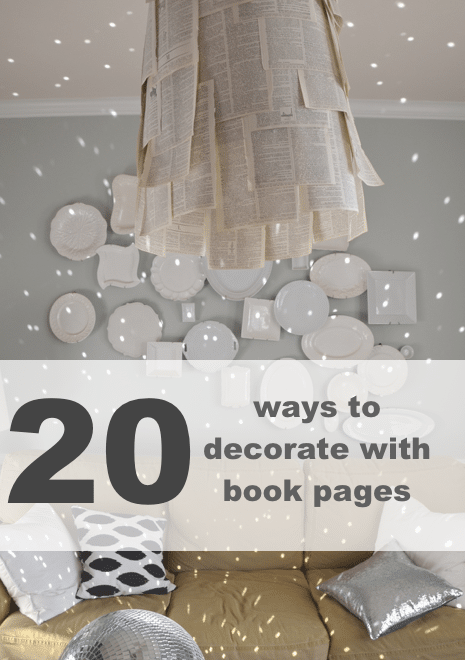
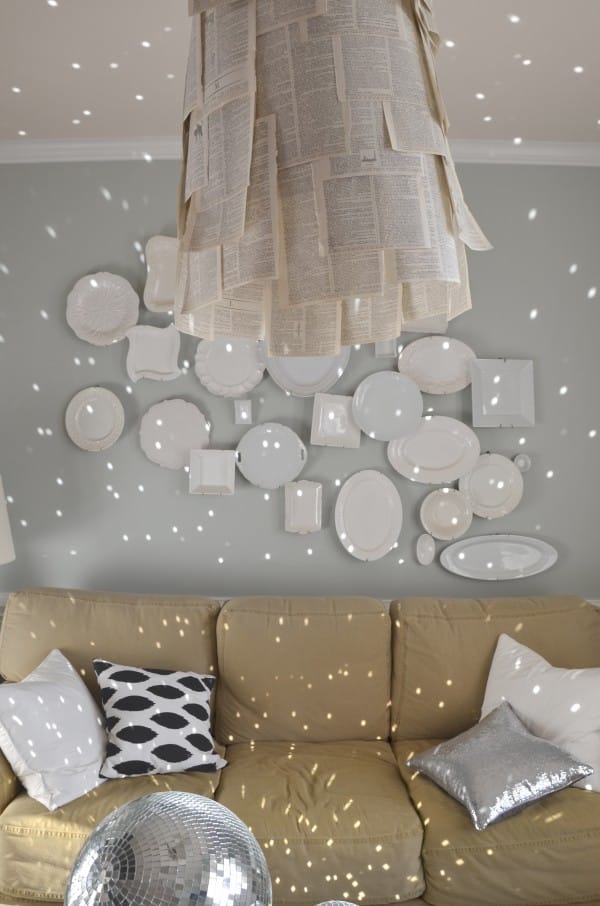
18. Make a book page chandelier

Two pieces of poster board, packaging tape, string, book pages plus hot glue.


Do not try this at home. Or at least if you do, don’t sue me if your house burns down, I’m not a lighting expert but, something feels safer to me about this than the paper lanterns we all buy from Ikea.


19. How about a book page corsage?

I like him on the door but…

you can clip him on a drape or a lamp shade or a pillow.

These rolled book pages are so interesting. I can hardly stop looking at them.
Oh.
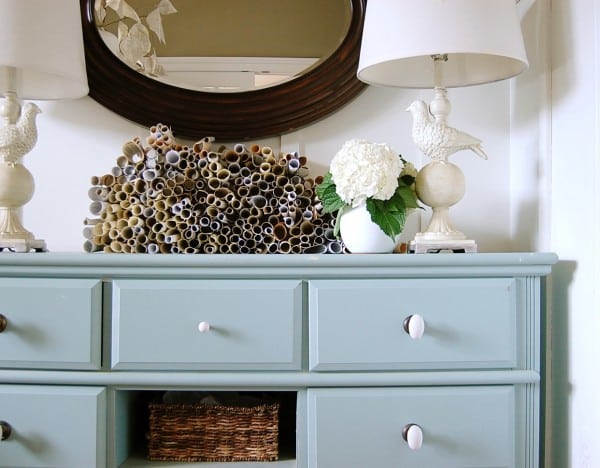
20. Roll book pages.

I just piled a bunch of the rolled up pages on the dresser in my office. Thanks to Caroline and Greta for rolling and gluing all of these–this was probably the most time-consuming project. But I love the artfulness of them, kind of like a sculpture.
I was pleasantly surprised with how versatile the book pages were to work with. Plus, my friends were so sweet to come help and Melissa, who lived to far away wanted to join in the pagey fun so it was easy to tell her to just look at my pinterest board and make anything she wanted as long as it was book pages. Here’s her post about what she made.

Now that the party is over, I plan on keeping most of the book page stuff around for a while. Funny, for years I’ve seen all the pretty book page stuff that bloggers have made and I never considered making anything for my own home. But, I love how neutral and textural the pages are, they are a blank canvas just waiting for you do to something with them. I think I’ll end up moving most of the items into my office over the next few weeks but, I can see how the garlands and such would be pretty at Christmas. And oh, wouldn’t a book page wedding be pretty?

You can see all the photos from the actual party here. More photos of the food and other such things are here.
Happy book paging!